
Tactical Analysis: West Brom 1-0 Coventry City
On February, 3rd 2023, at 9:56 PM, referee Gavin Ward blew for full time in what could go down as one of the biggest wins in West Bromwich Albion’s season. A 1-0 win saw West Brom, (who had lost to Coventry by the same score less than 2 months ago), sail into the playoff places and once again, dreaming of the Premier league.
Before this game, West Brom had lost 2-1 to Burnley and 3-0 to Bristol City, consecutively, leading to discontent and even boos from small sections of the fanbase. So to many, this game was crucial as a win would not only put The Baggies in the playoffs but also prove those who had begun to doubt Head Coach Carlos Corberan and his team were wrong.
This is why the majority of West Brom fans reacted so nervously to news of an injury to Alex Palmer which meant the return of David Button. Fortunately for Albion Button rose to the occasion and found himself surrounded by his teammates at full-time following a match-winning catch in the dying seconds of the game. This piece will look at how West Brom controlled the match and righted their wrongs against the sky blues, and put any ideas of a losing run to bed.
Attacking Structure
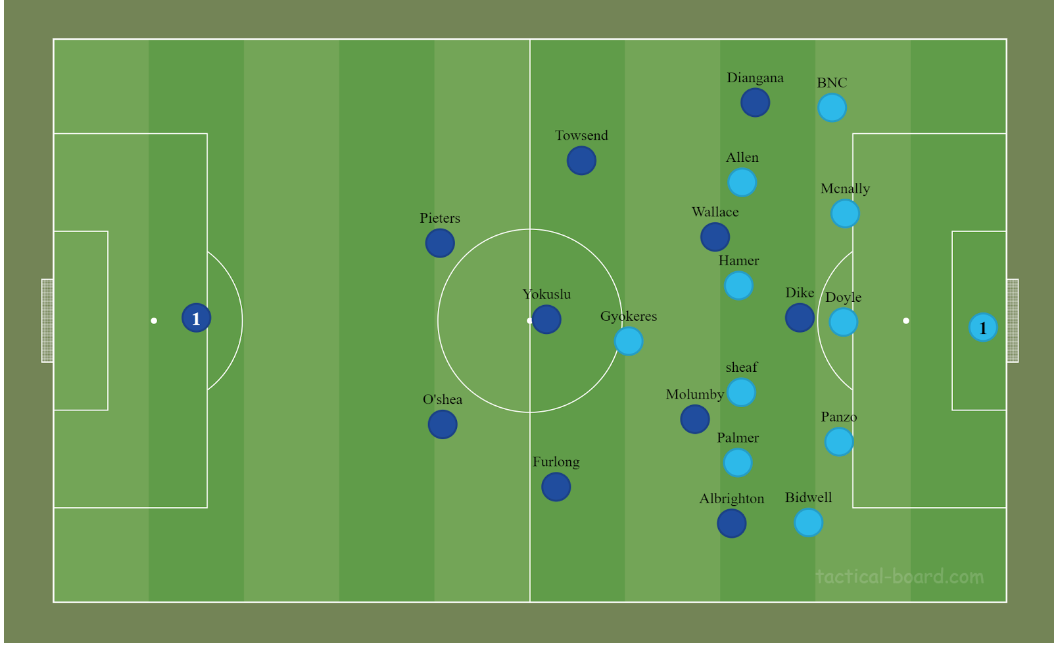
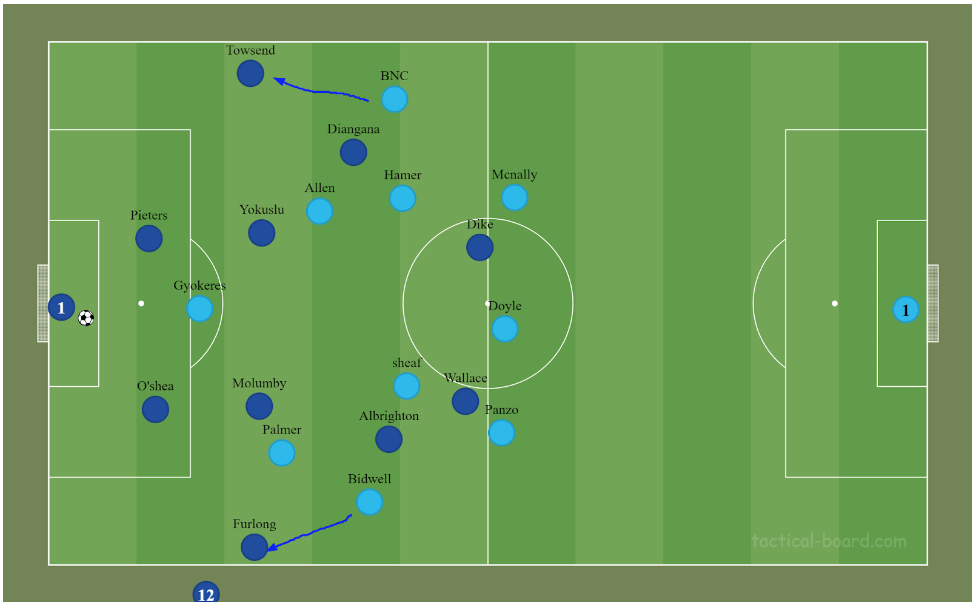
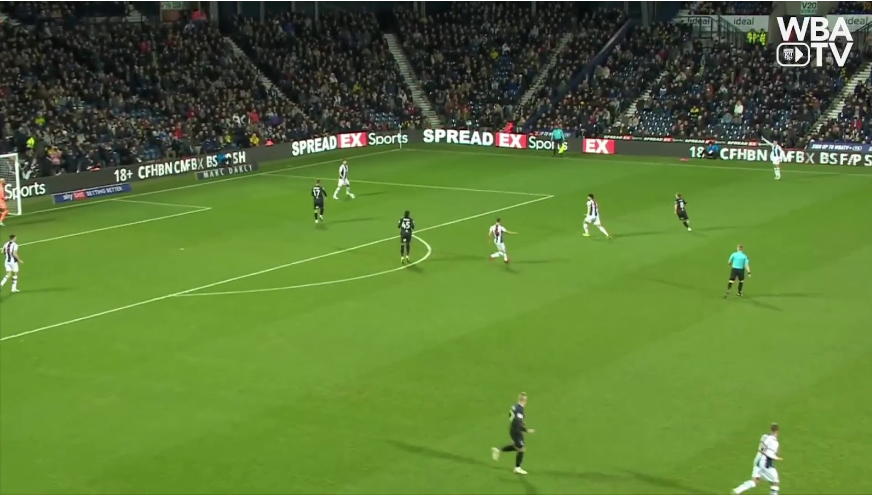
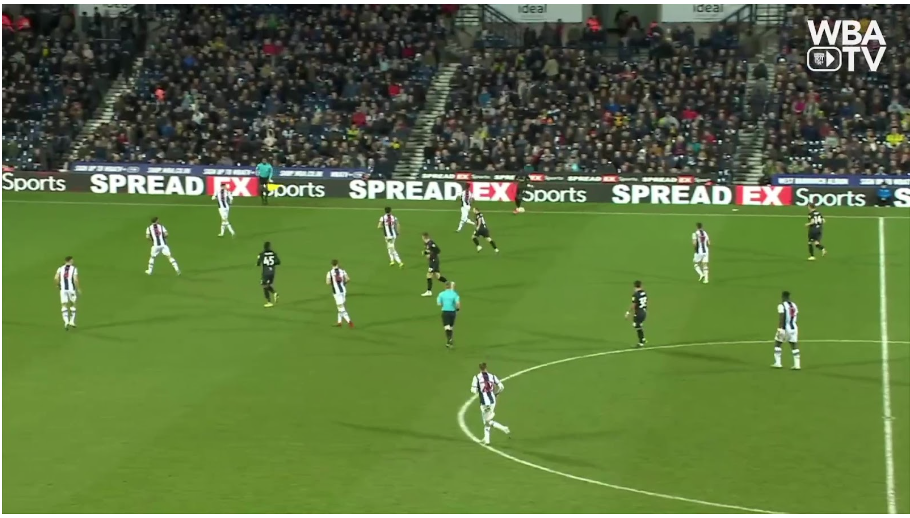
West Brom in possession 2-3-5 vs Coventry’s 5-4-1 block
As always, West Brom operated in a 2-3-5 formation with the fullbacks inverting and the “10”, in this case, Jed Wallace being given a free role.
West Brom’s 2-3-5 in action
A key element of the way Albion approached this game was how they attacked down the flanks. Coventry defended their box in a 5-4-1 block with a narrow midfield spanning the width of their penalty area which meant creating chances centrally was difficult.
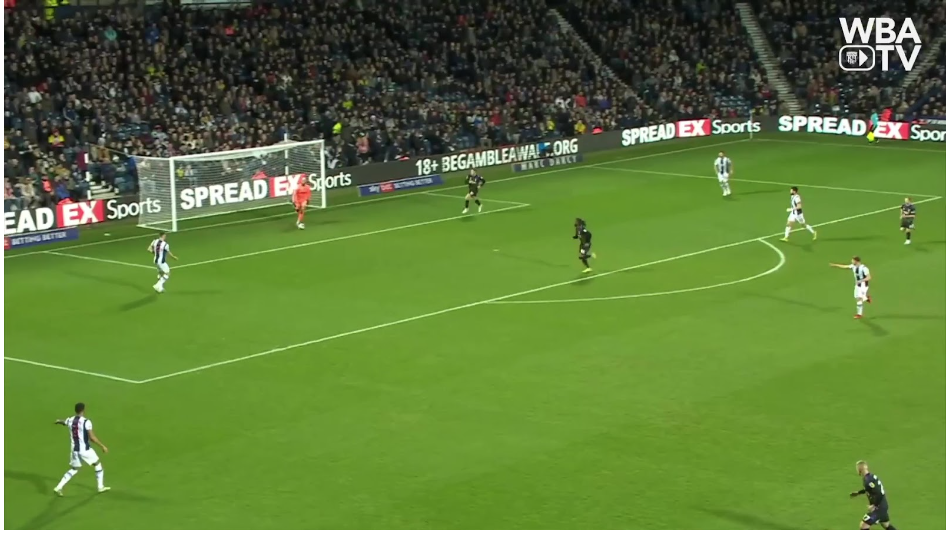
Coventry attempted to go man for man in wide areas, planning for West Broms usual three-man right-hand side rotation. This strategy was rendered useless by the addition of Marc Albrighton. Albrighton played on the right wing against Coventry, allowing Jed Wallace to play in the 10 role.
With Wallace naturally being a right winger he was comfortable making runs on the right flank and attempting crosses or cutbacks throughout the game. This meant Albion had an extra man involved on the right which gave them a numerical advantage. Coventry struggled to cope and West Brom created most of their opportunities from here.
West Brom taking advantage of their numerical advantage on the right-hand side
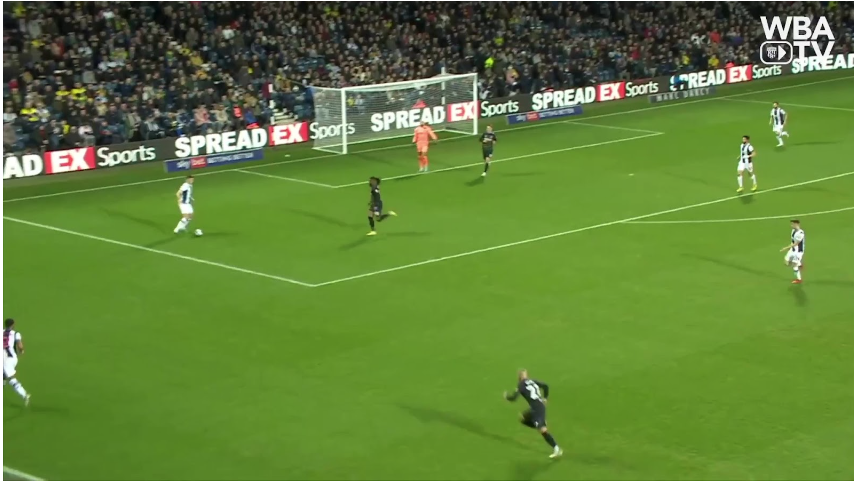
West Brom were less fluid on the left. Grady Diangana and Conor Townsend would still rotate with Townsend’s overlapping runs proving effective throughout the game. Albion swapped the wingers for a short time and this led to one of the better opportunities in the game. The midfield showed fluidity with Darnell Furlong often inverting into space created by Jayson Molumby moving further up the pitch.
Despite all this good work from Albion, it is impossible to ignore how poorly Coventry defended their box on the night. Coventry provided an almost perfect example of how not to defend your area against The Baggies, miskicking clearances and missing headers throughout the game. At times their defending could only be described as calamitous, Callum Doyle played poorly during the game. The Manchester City loanee missed a crucial header which allowed Albion to score the winner and he does not look comfortable at this level.
Build-up
Against Coventry, West Brom put out their best performance in the build-up phase since Head Coach Carlos Corberan’s arrival. Perfection from start to finish. Albion mainly built out in a 2-4 in the first phase but showed flexibility in their build-up structure throughout the game with a 3-2, 3-3 and 2-3 shape all being on show at times.
4-2 build-up structure
3-3 build-up structure
Individually the West Brom players did a good job in baiting the Coventry press, waiting for Coventry to make their move and then playing through them with ease. The Coventry players spent most of their time off the ball chasing shadows whilst Corberans men delivered a masterclass in build-up play. When progressing through central areas the responsibility was shared between Okay Yokuslu and Jayson Molumby in midfield.
Coventry pressed with a narrow front 3-4-3. At times this shape would turn into a diamond with one of the midfielders backing up the front 3 in their press. The Coventry wingbacks would look to step up onto the West Brom fullbacks.
Coventry’s pressing structure
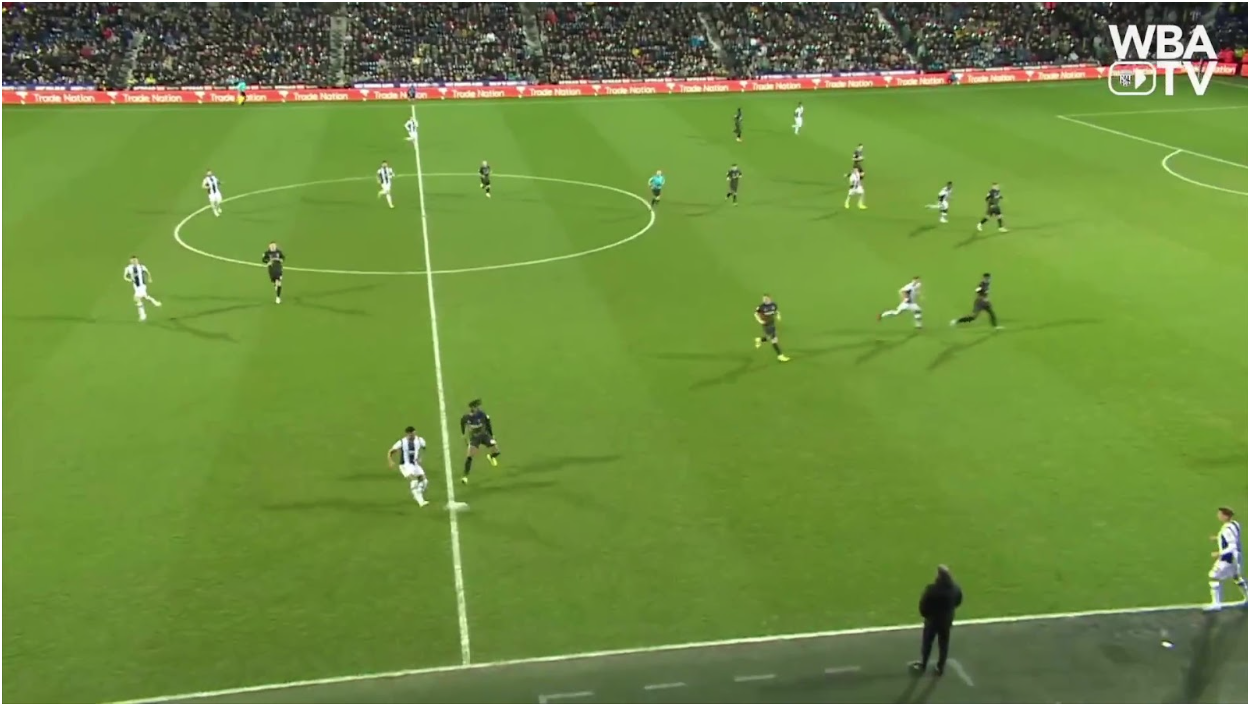
This forced Albion to be composed and intelligent in their pass selection if they were to break out the press. Dara O’Shea was impressive in that respect, always seeming to make the right pass.
O’Shea receives the ball off a goal kick drawing in Viktor Gyokeres
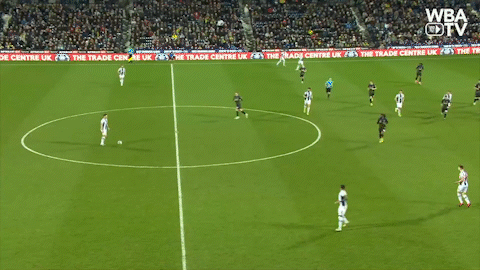
O’Shea passes to Molumby which draws in Kasey Palmer
Molumby plays it first time into Erik Pieters which takes the Coventry front three to the left side of the pitch.
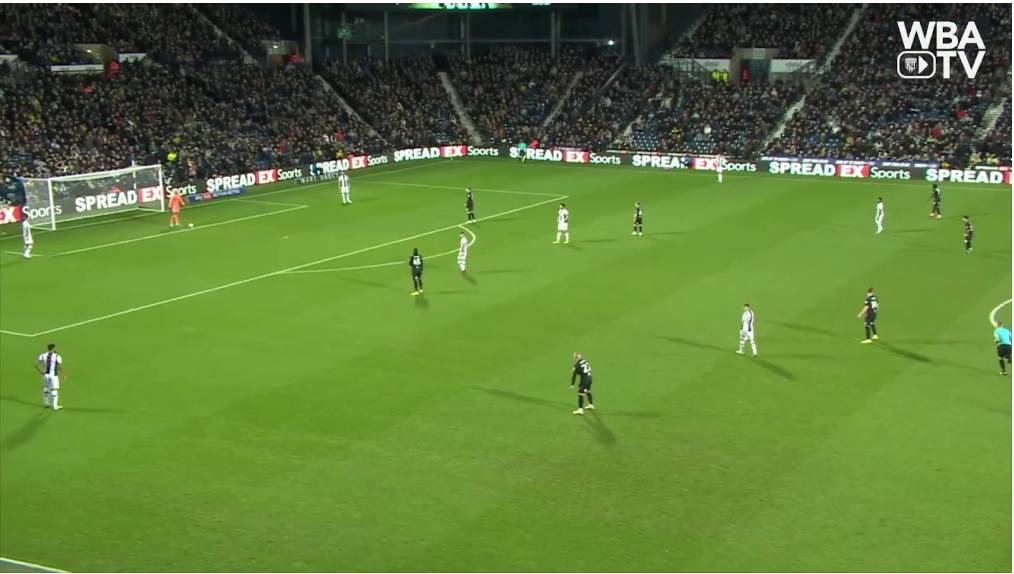
Pieters plays a short pass into David Button who now has an open right side to work with. The Coventry left wing-back, Jake Bidwell gets ready to step up onto Darnell Furlong.
 O’Shea receives with his body sideways to bait the press of Palmer. Bidwell back steps up onto Furlong leaving space in the middle of the pitch.
Molumby receives the ball in open space and plays the ball into Jed Wallace. Albion breaks out of the press.
Despite West Brom’s brilliance in the build-up phase, Coventry still could have done better pressing-wise. They started the game with intensity but as the match went on, that seemed to fade. Unlike at the Coventry Building Society Arena, the Sky Blues were not aggressive or energetic in their press. Without the boost of their home crowd, it just seemed half-hearted. This helps explain why they have won only one match since they beat West Brom in late December.
Defensive Structure
When defending in a block, West Brom’s game plan was to make sure Coventry’s wing-backs didn’t have time on the ball whilst keeping the midfield as compact as possible. They did this by using a narrow 4-3-3 mid-block and the 4-4-2 block they’ve used since November. The 4-3-3 was used when the Coventry centre-backs had the ball near the halfway line.
Coventry’s centre-backs mainly played passes into their wingbacks as opposed to playing through the midfield due to spaces between the lines being so congested. This approach denied Coventry’s attacking midfielders the ball in dangerous areas and led to them being forced to play the ball back into their own half frequently.
The West Brom players would also shift to the ball side of the pitch to be more compact. A useful by-product of this shape is that it creates a box around Coventry’s midfield, making it easier to win the ball back if Coventry tried to play through the middle.
West Brom’s narrow 4-3-3 shape
West Brom’s box in action
It also meant that the centre-backs were the only Coventry players able to switch the play as there was constant pressure on the ball in wide areas, with them all having relatively poor games this didn’t happen enough to cause West Brom any real problems. It’s also important to note that this is the first time West Brom have set up this way under Corberan which shows that they are still evolving under his management.
If not using the 4-3-3 West Brom would defend with a narrower version of their usual 4-4-2 block. The narrowness of this block allowed them to get more bodies near the ball and block passes into and shots from outside the penalty area. This was made possible by Coventry not posing much of a threat from wide positions.
West Brom’s 4-4-2 block usually transitions into a 5-3-2 to help cope with wide overloads, but against Coventry, this wasn’t necessary as the Sky Blues only had one wide player on either side of their attack. West Brom were proactive when defending making sure they got the first contact on any loose or long balls. They were determined to keep Coventry from getting the ball behind their defence, with Callum O’Hare injured, Coventry’s only way of creating chances from open play was cutbacks or low crosses across the box.
Coventry’s Goal Kicks
Against Coventry, West Brom were incredibly aggressive in the way they pressed the opposition’s goal kicks. They pushed three men up to the edge of the Coventry penalty area, making it difficult for them to play out from the back. They went man for man in Coventry’s build-up phase making them choose between potentially losing the ball in a dangerous position or going long and sacrificing control. Coventry mostly chose the latter.
The way Albion approached the game was almost arrogant. They knew they were more physically imposing than Coventry in midfield and that turning the game into a selection of 1v1 duels would almost guarantee success. The Coventry goalkeeper, Ben Wilson kicked over 75% of his goal kicks long, making it easier for Albion, who just simply won their duels and picked up the loose balls.
Had Coventry committed to playing out the press they may have been more successful. In the few times, they did choose to play out they usually got it out of their half. The problem for Coventry was that they then lacked sufficient numbers in forward positions to sustain attacks. You also can’t really blame a team with one win since the New Year for lacking confidence.
Where’s Gyokeres?
Viktor Gyokeres is easily one of the best strikers in the Championship. He’s quick, strong and an incredible finisher. But against West Brom, his involvement was limited. A big reason for this was him being incredibly isolated, fighting for long balls and forced to be Coventry’s only outlet in possession. In the second half, Coventry brought on an extra striker in Matt Godden to help with this but it was too late and Gyokeres was already visibly frustrated.
Another factor was the West Brom centre-backs having two very distinct jobs. O’Shea would man-mark Gyokeres. His job was to be aggressive, get tight and make his Gyokeres’ life hell. Pieters would act as a last line of defence and was asked to sweep up and deal with the Swede should O’Shea fail to contain him.
This strategy worked and Gyokeres was marked out of the game having fewer touches than any Coventry player who completed the full 90 (30). In the end, Gyokeres was forced to hang out wide in the hope of getting a chance on transition. O’Shea was dominant and could very easily have been awarded man of the match despite Gyokeres missing an incredibly presentable chance at 0-0 and snatching at another in the second half.
Jed Wallace
Jed Wallace starting in the 10 role was an odd sight to some Baggies fans. He is the best right winger in the squad and to move him to a more unfamiliar position seemed strange. As always, Corberan had a plan. Wallace is an exceptional presser who likes to close down defenders high up the pitch. This can be a problem if you’re a wide player in Corberan’s mid-block as it leaves gaps in your team’s structure due to you being expected to hold your position and help deal with wide overloads.
West Bromwich Albion’s 2021/22 – A Lesson in Footballing Philosophy
Against Coventry, this issue was nullified by him being in the first line of defence, where Corberan wants his players to press high up the pitch and be aggressive. It’s a nice touch from Corberan and shows how good the Spaniard is at maximising a player’s strengths for the good of the team.
In possession, Wallace is a strong runner both with and without the ball and that combined with his direct nature in possession made him West Brom’s biggest attacking threat on the night. Wallace completed 9 progressive actions and made 4 tackles (a team high). He also assisted the winning goal. Such high output both with and without the ball can only be a positive.
Impact Subs
West Brom saw out the match comfortably with Coventry only having one quality chance in the second half, a Gyokeres shot from outside the area fired narrowly over the bar. It wasn’t a rearguard performance where Albion defended with their life, their goal was hardly threatened with Coventry’s only shot on target being a free kick in the second half.
This is in part down to West Brom’s subs, most notably John Swift and Nathaniel Chalobah. Swift was brought on, for Marc Albrighton in the 74th minute, under the instructions of keeping the ball in the final third. Swift was excellent, he retained the ball high up the pitch with his wonderful mix of skill and intelligent combination play. He did an incredible job and left the crowd in awe, despite not threatening the goal.
Chalobah was less flashy but just as effective, brought on in the 67th minute for the more progressive Yokuslu, Chalobah kept things simple completing 9/9 of his passes and not attempting to progress the ball, instead just making sure his team kept it. A stable presence in what was threatening to become a chaotic midfield.
Conclusion
Despite West Brom’s brilliance in open play, it was a long throw which saw Grady Diangana score the winner early on in the game. A goal that typified this West Brom team. Passion and commitment. Jed Wallace had no right to get to that throw, but he did and his flicked header towards the back post was as inch-perfect as one of his crosses. Diangana simply could not miss.
Ultimately, Albion were great on the night, and after escaping a couple of early Coventry chances with the score still level they looked confident on the ball and comfortable with it. A truly dominant performance from the Baggies and something they can build on with the playoff run fast approaching.
By: Ricky Lee Griffiths / @rickyleegriffi2
Featured Image: @GabFoligno / Mike Egerton – PA Images